UPDATED MAR 2020. In today’s post, I’m sharing a guide on how to hike the Kealia Trail on the North Shore. This steep, switchback laden hike is a lesser-known trail with incredible views away from all the crowds. I did this hike as a solo adventure and it was such a great experience out in nature. Hopefully, this can be a useful guide to help you plan your own adventure and if you have any questions, just let me know.
How To Hike The Kealia Trail On The North Shore Of Oahu

Disclaimer
There are affiliate links included in this post. This means at no extra cost to you, I earn a commission if you book through the link.
FAQ for hiking the Kealia Trail
Where is it located?
North Shore, about 1 hour drive from Waikiki.
How long does it take?
3-4 hours depending on your pace.
What skill level is required?
Beginner. It is steep with lots of switchbacks but no advanced skills needed.
Is there a cost?
No, it’s free.
Are dogs allowed?
Yes, on a leash.
What should you bring with you?
- Hat
- Sunscreen
- Water bottle
- Good hiking shoes (I use the New Balance Minimus
 and love them)
 - Camera (I use a GoPro and this floaty selfie stick for water adventures or this selfie stick and tripod combo for land adventures)
- Swimsuit and lightweight towel to go to the beach afterward
Where to start the Kealia Trail
How to get to the Kealia Trail
You can use ‘Kealia Trail’ in Google Maps to get you there. The fastest way to get there will be up the middle of the island. On the way back, I recommend taking the scenic route using the Kamehameha Highway and beach hopping along the way.
Drive until you reach the west gate which has a sign marking it the turnoff for the Kealia Trail.
Follow this around the bend until you see a parking lot on your left which is where you will leave your car and venture off on foot.
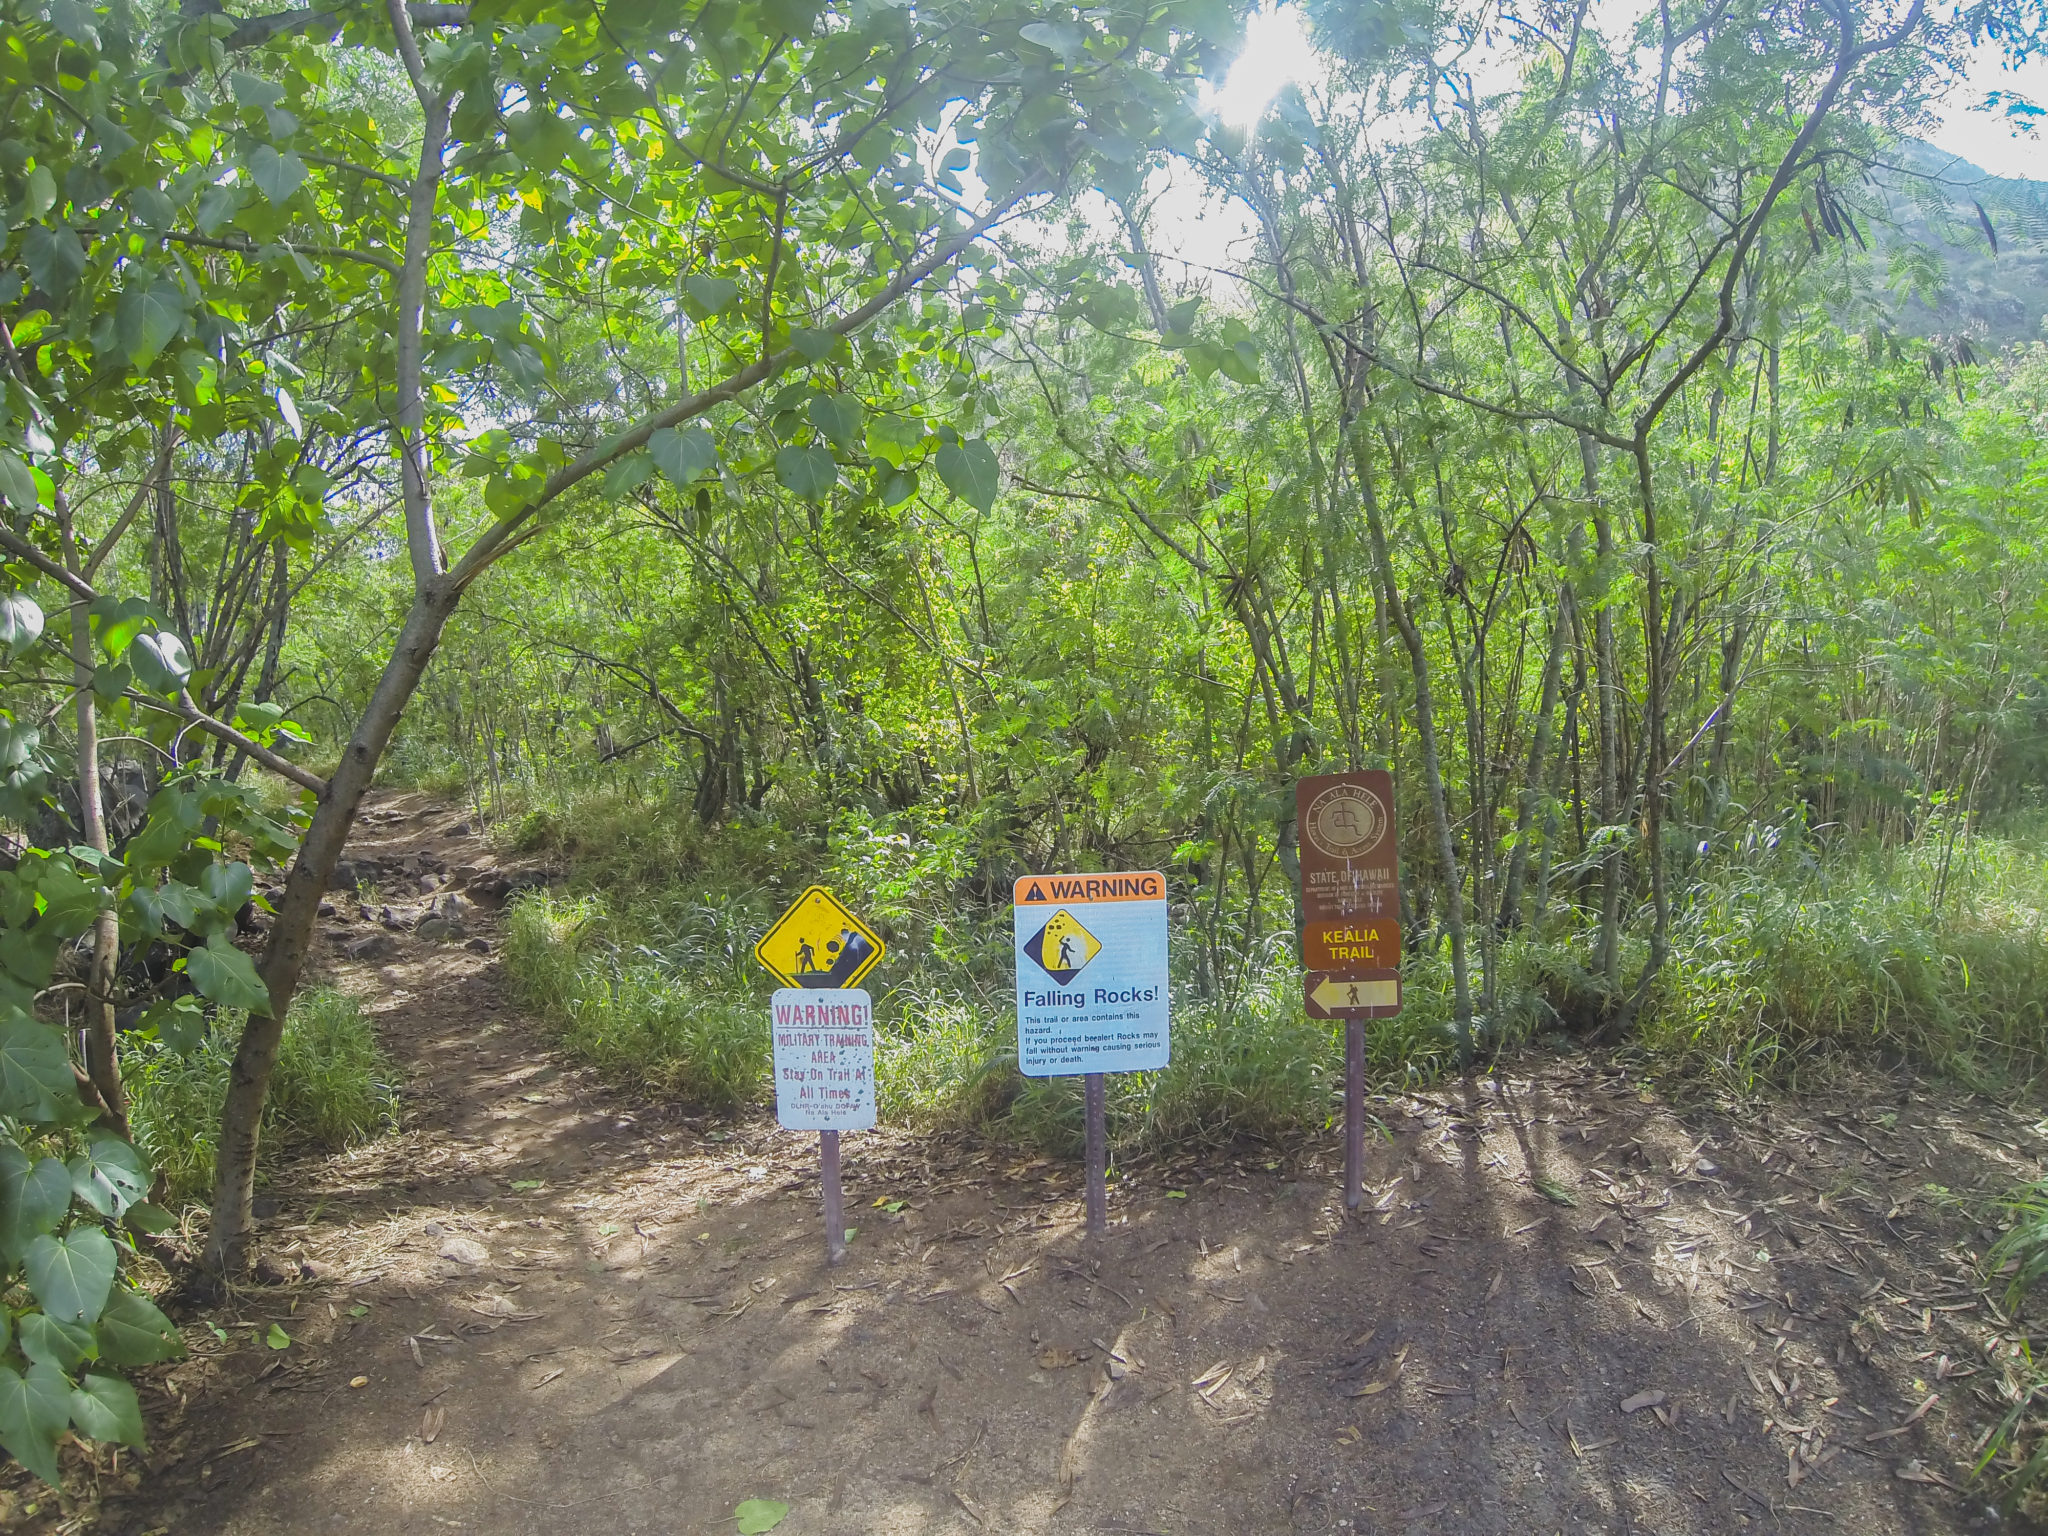
There is a sign to guide you so just walk in the direction of the sign.
At first, it seems like you are walking into nowhere, but keep to the left and soon you will reach the beginning of the trail itself which is signed so you will know you are heading in the right direction.
What to expect
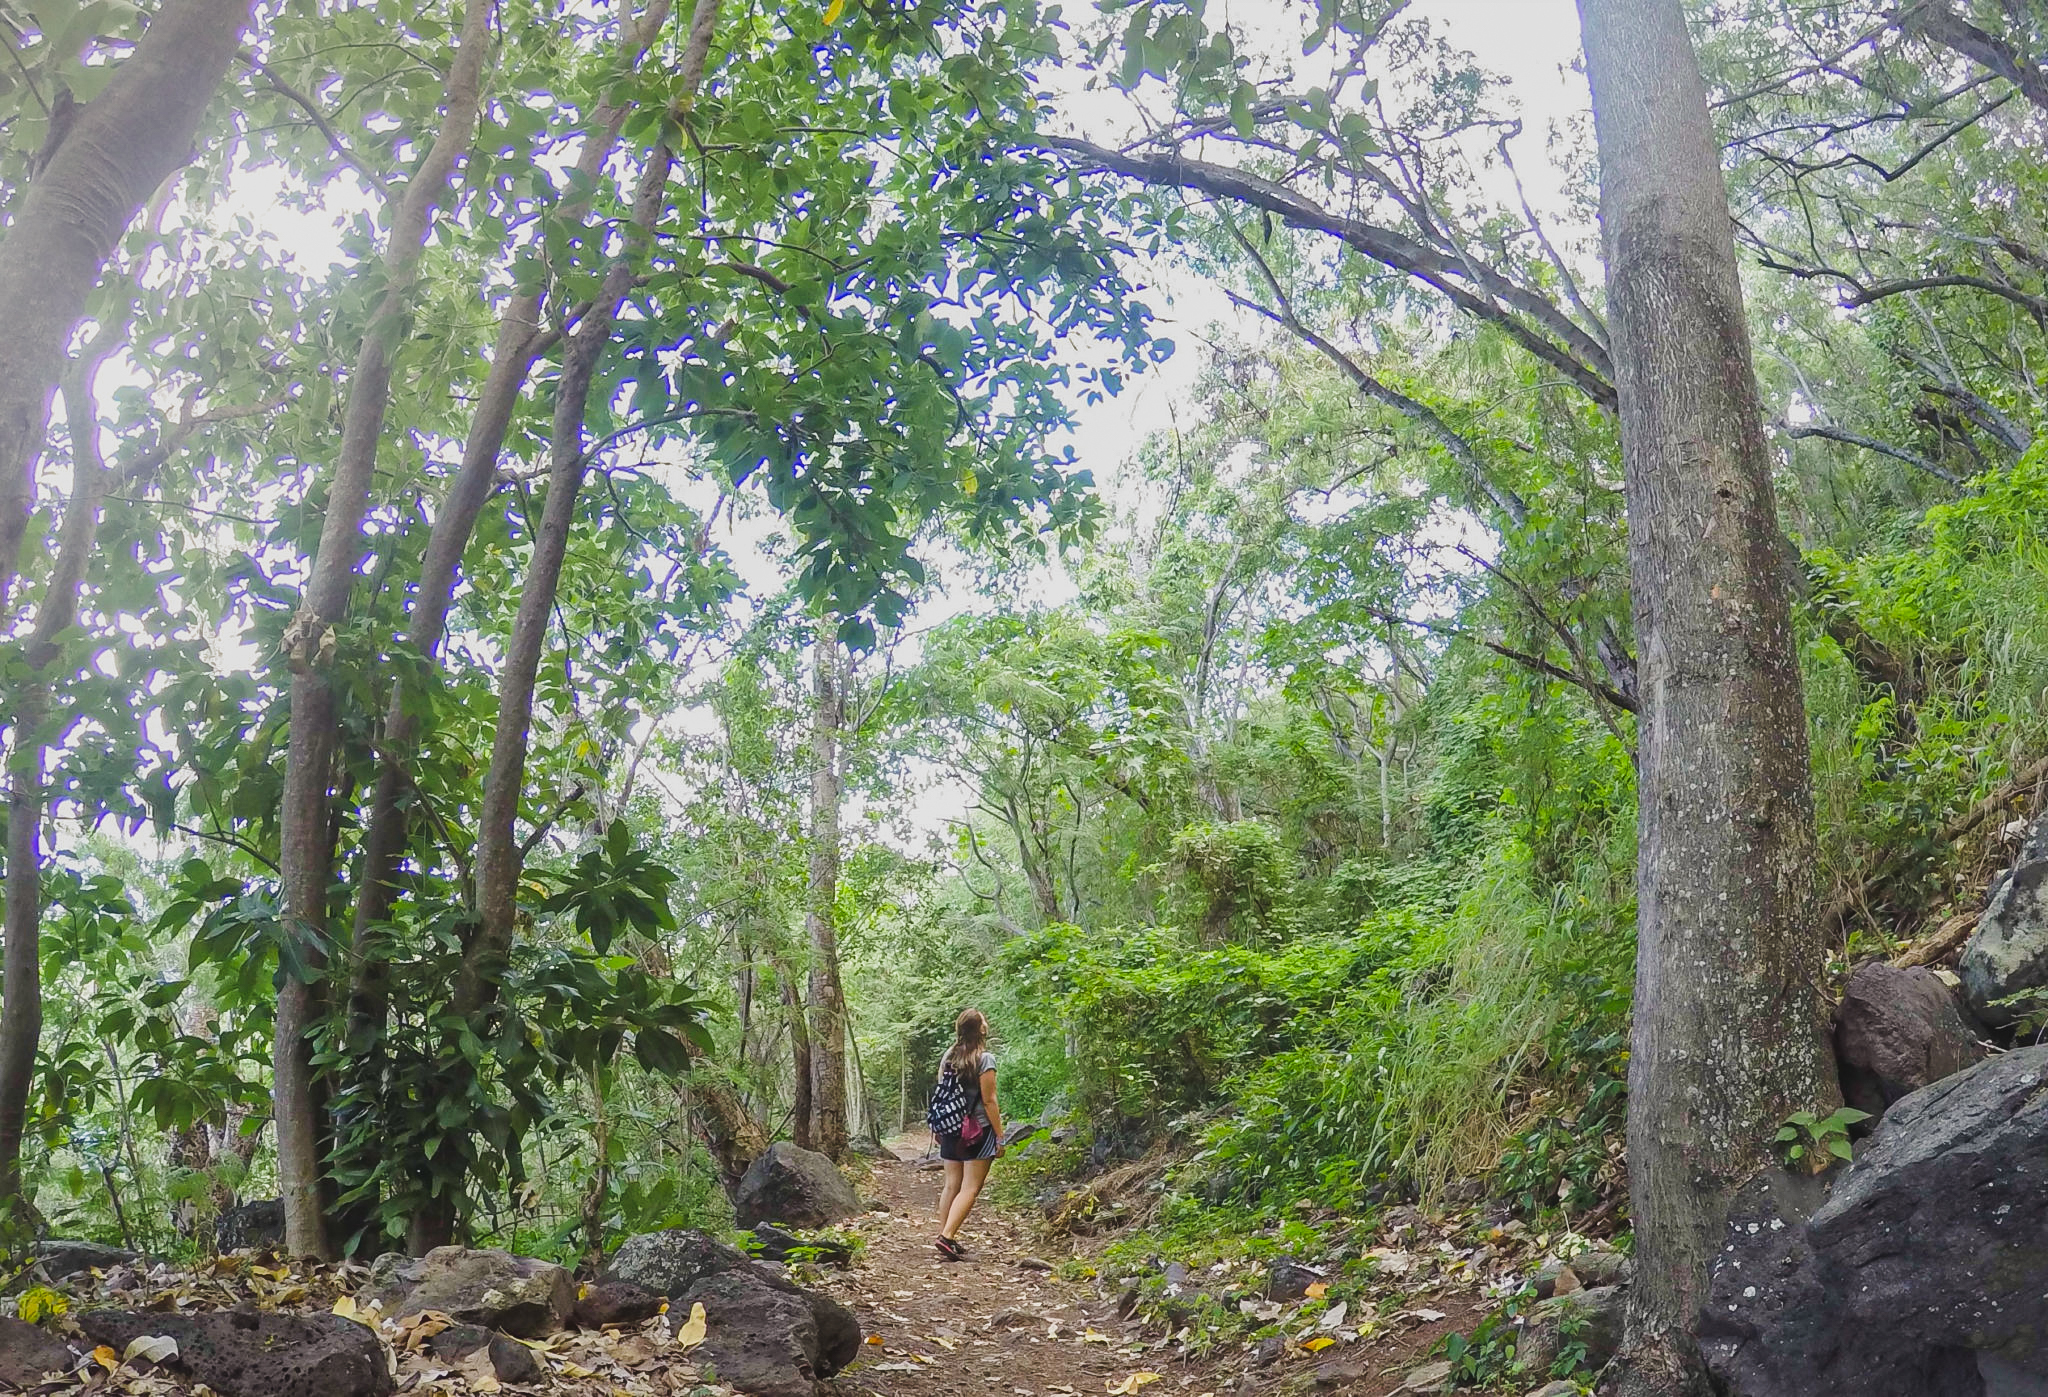
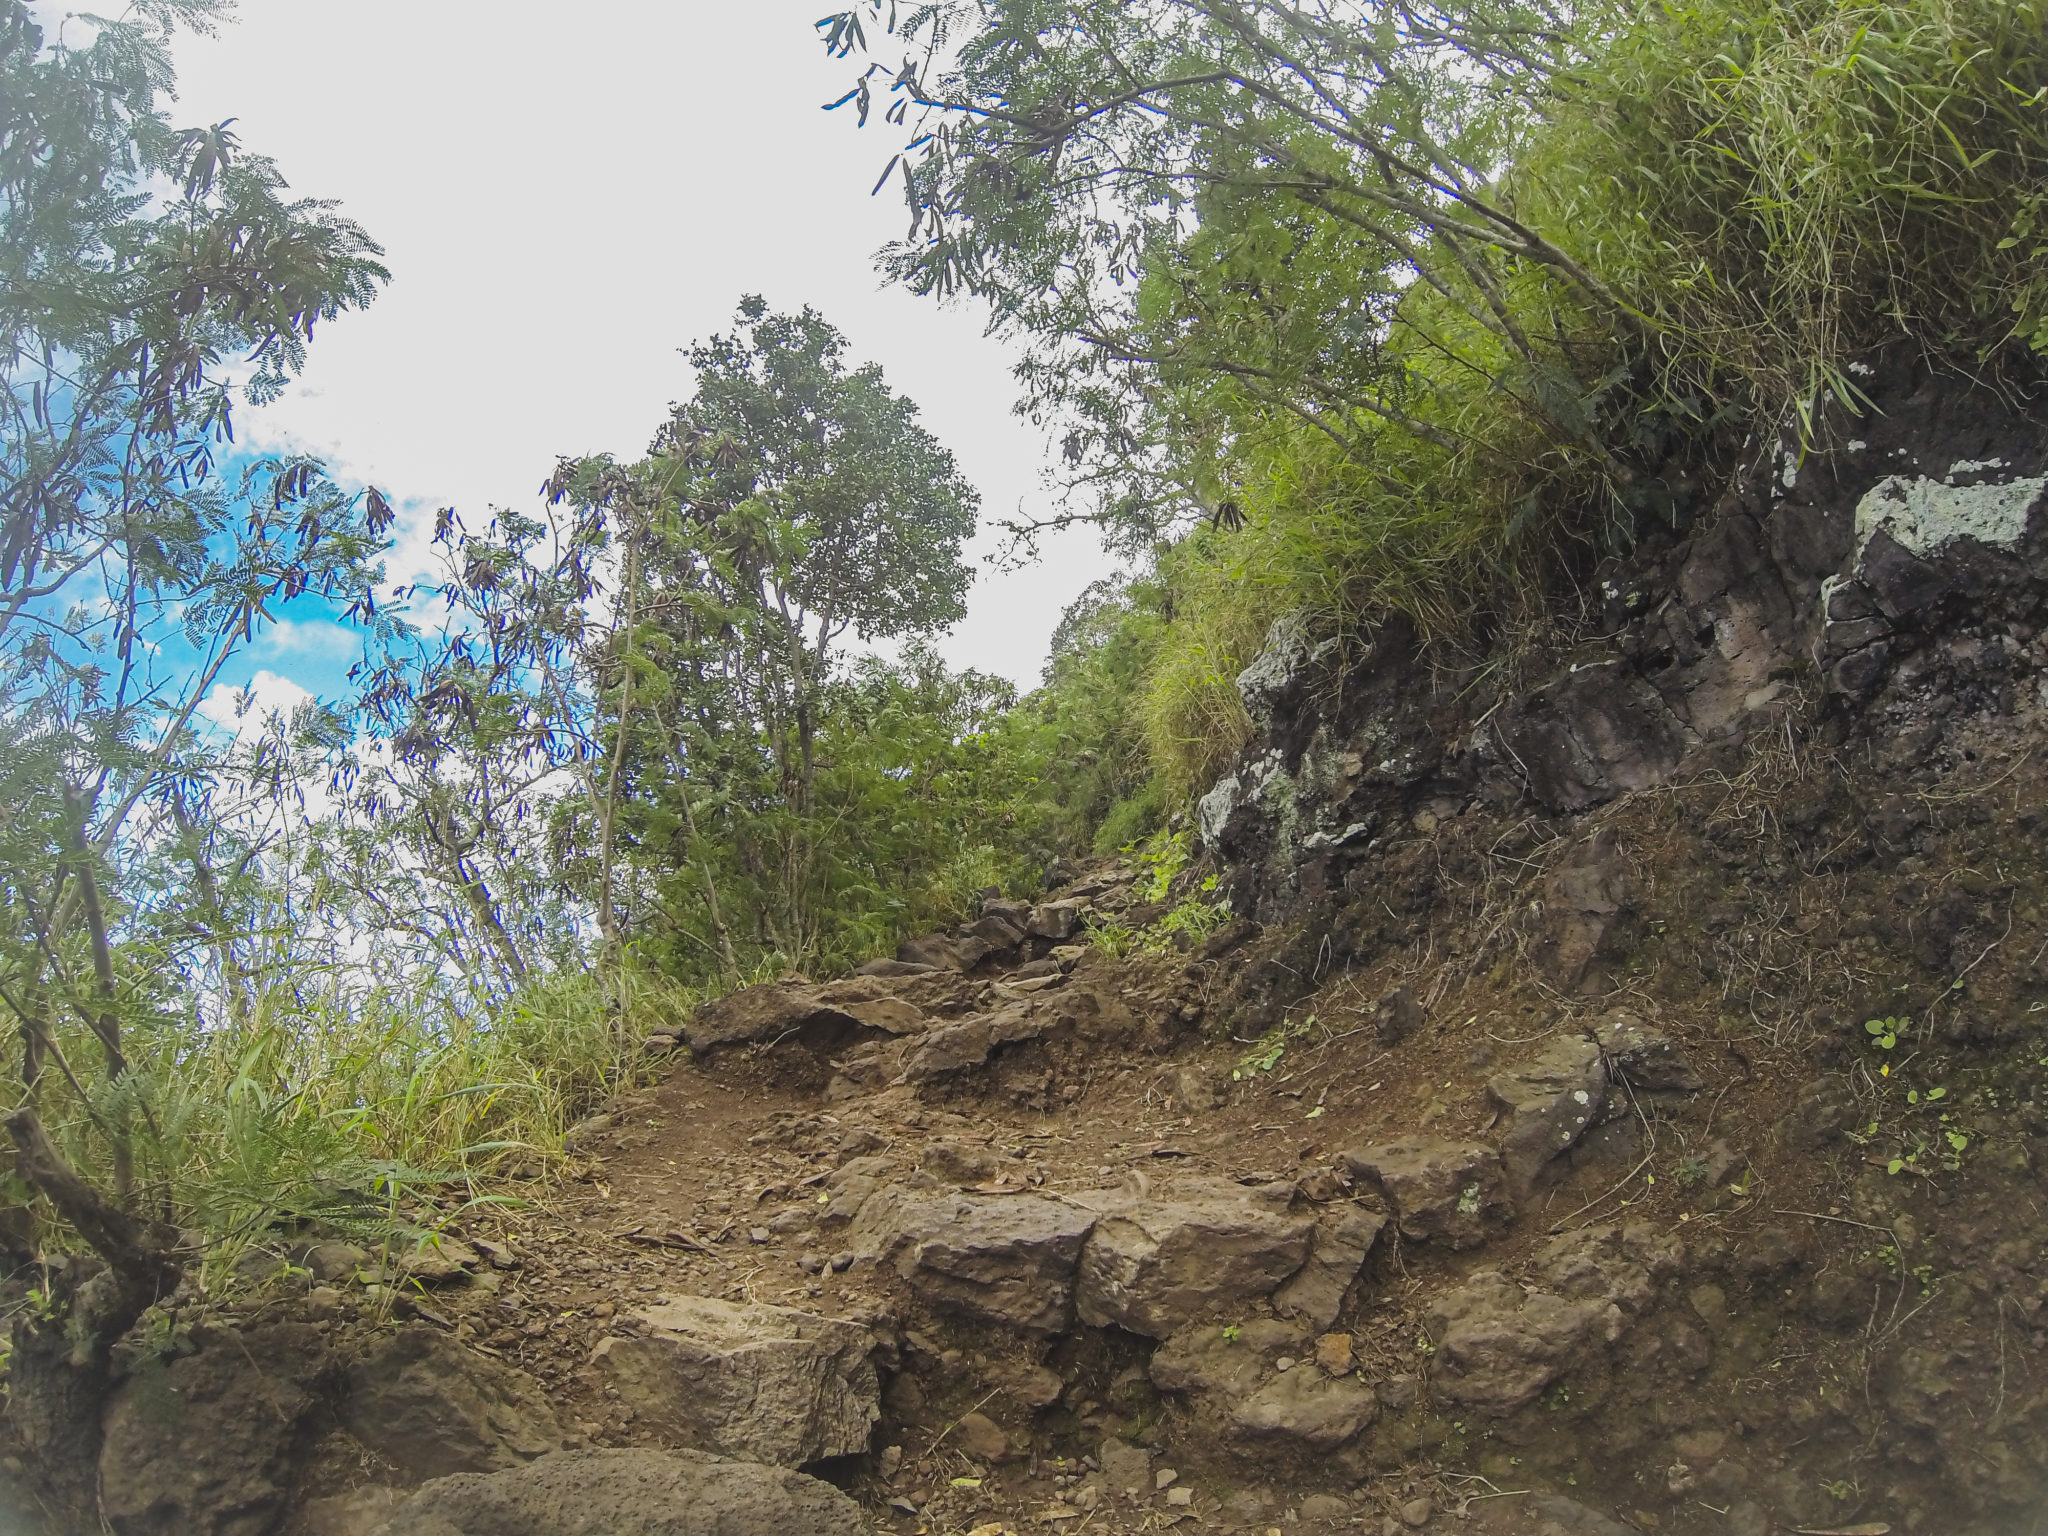
The trail is simple to follow as it moves up at a steady incline on a clear path.
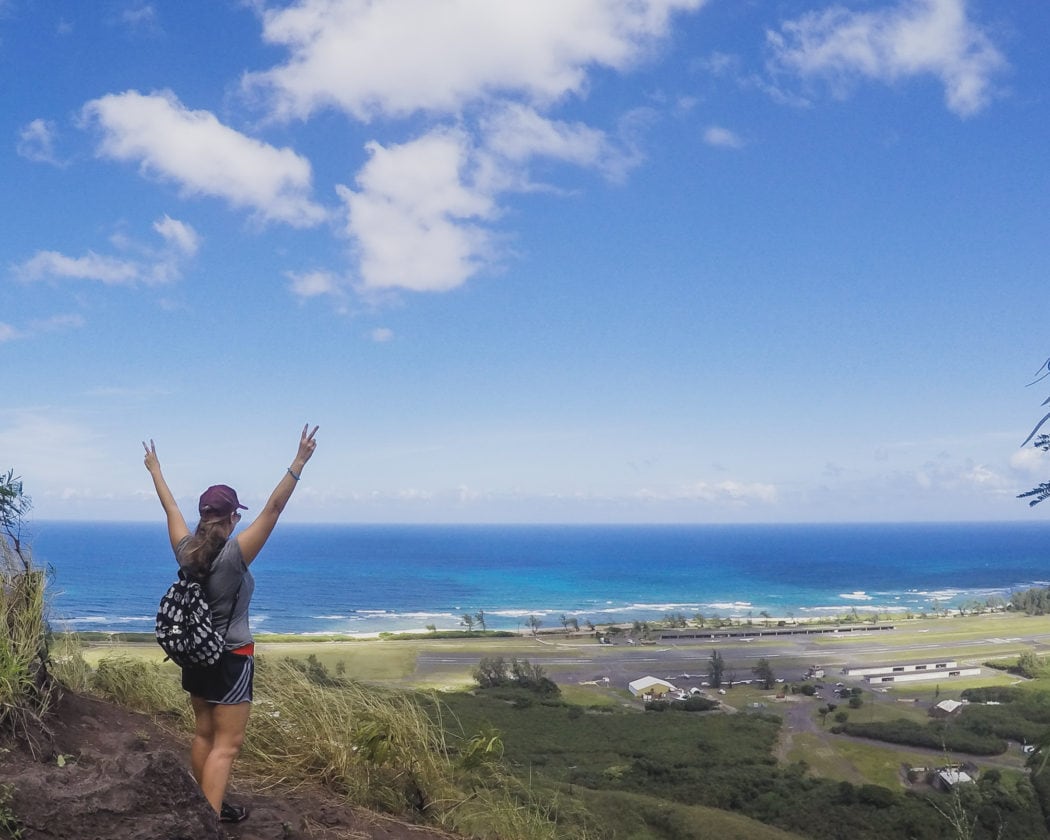
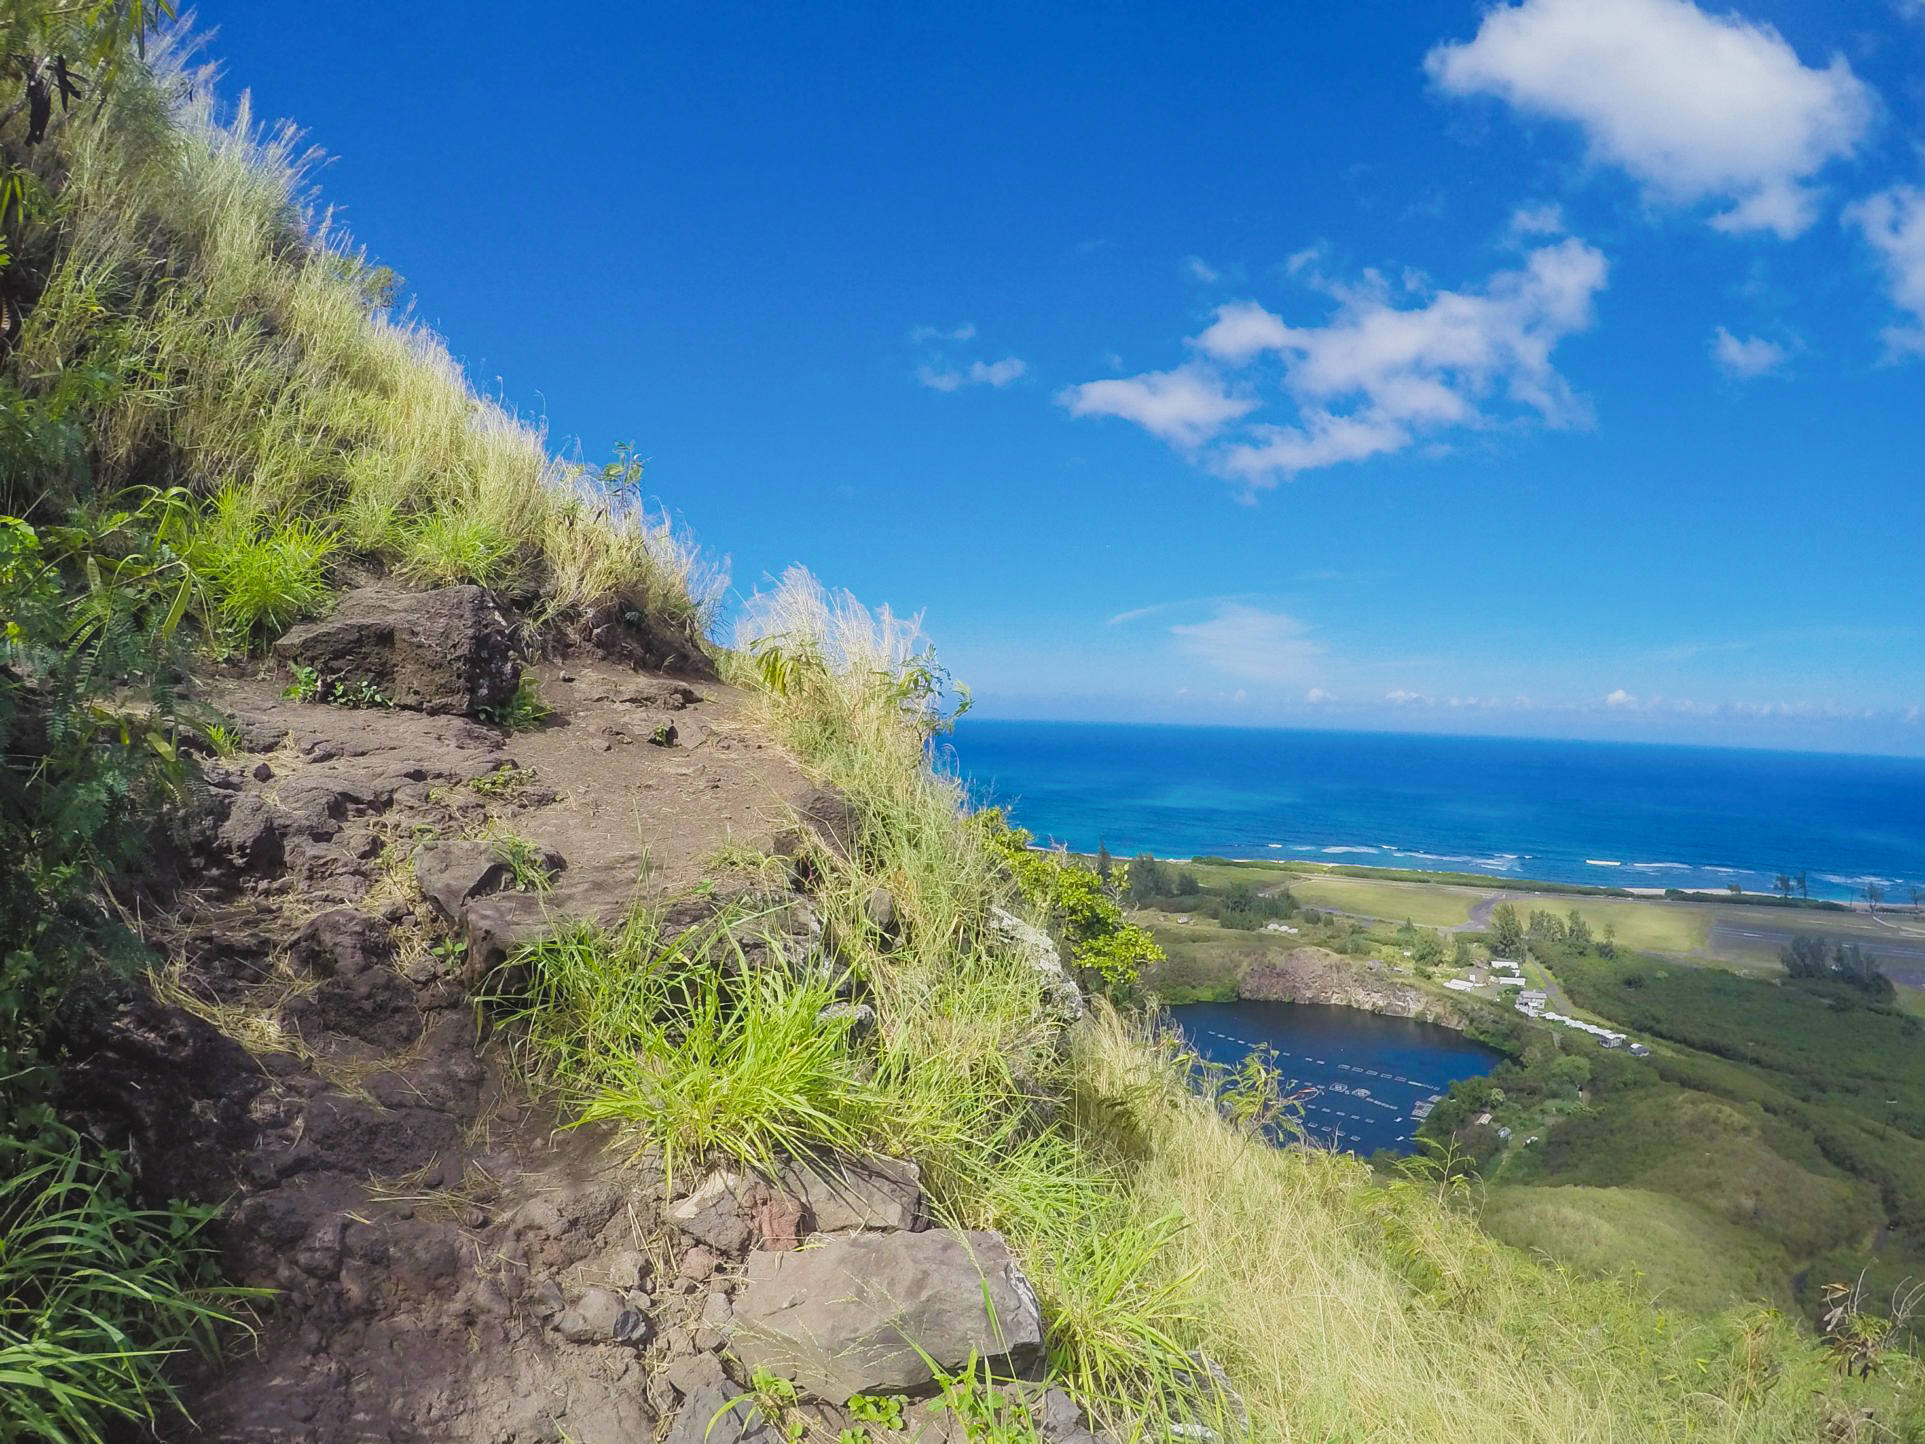
Get your calves ready because the trail just keeps going up, up, up, and has switchback after switchback after switchback! The good news is, aside from getting a good leg workout, you are also rewarded with some pretty impressive views.
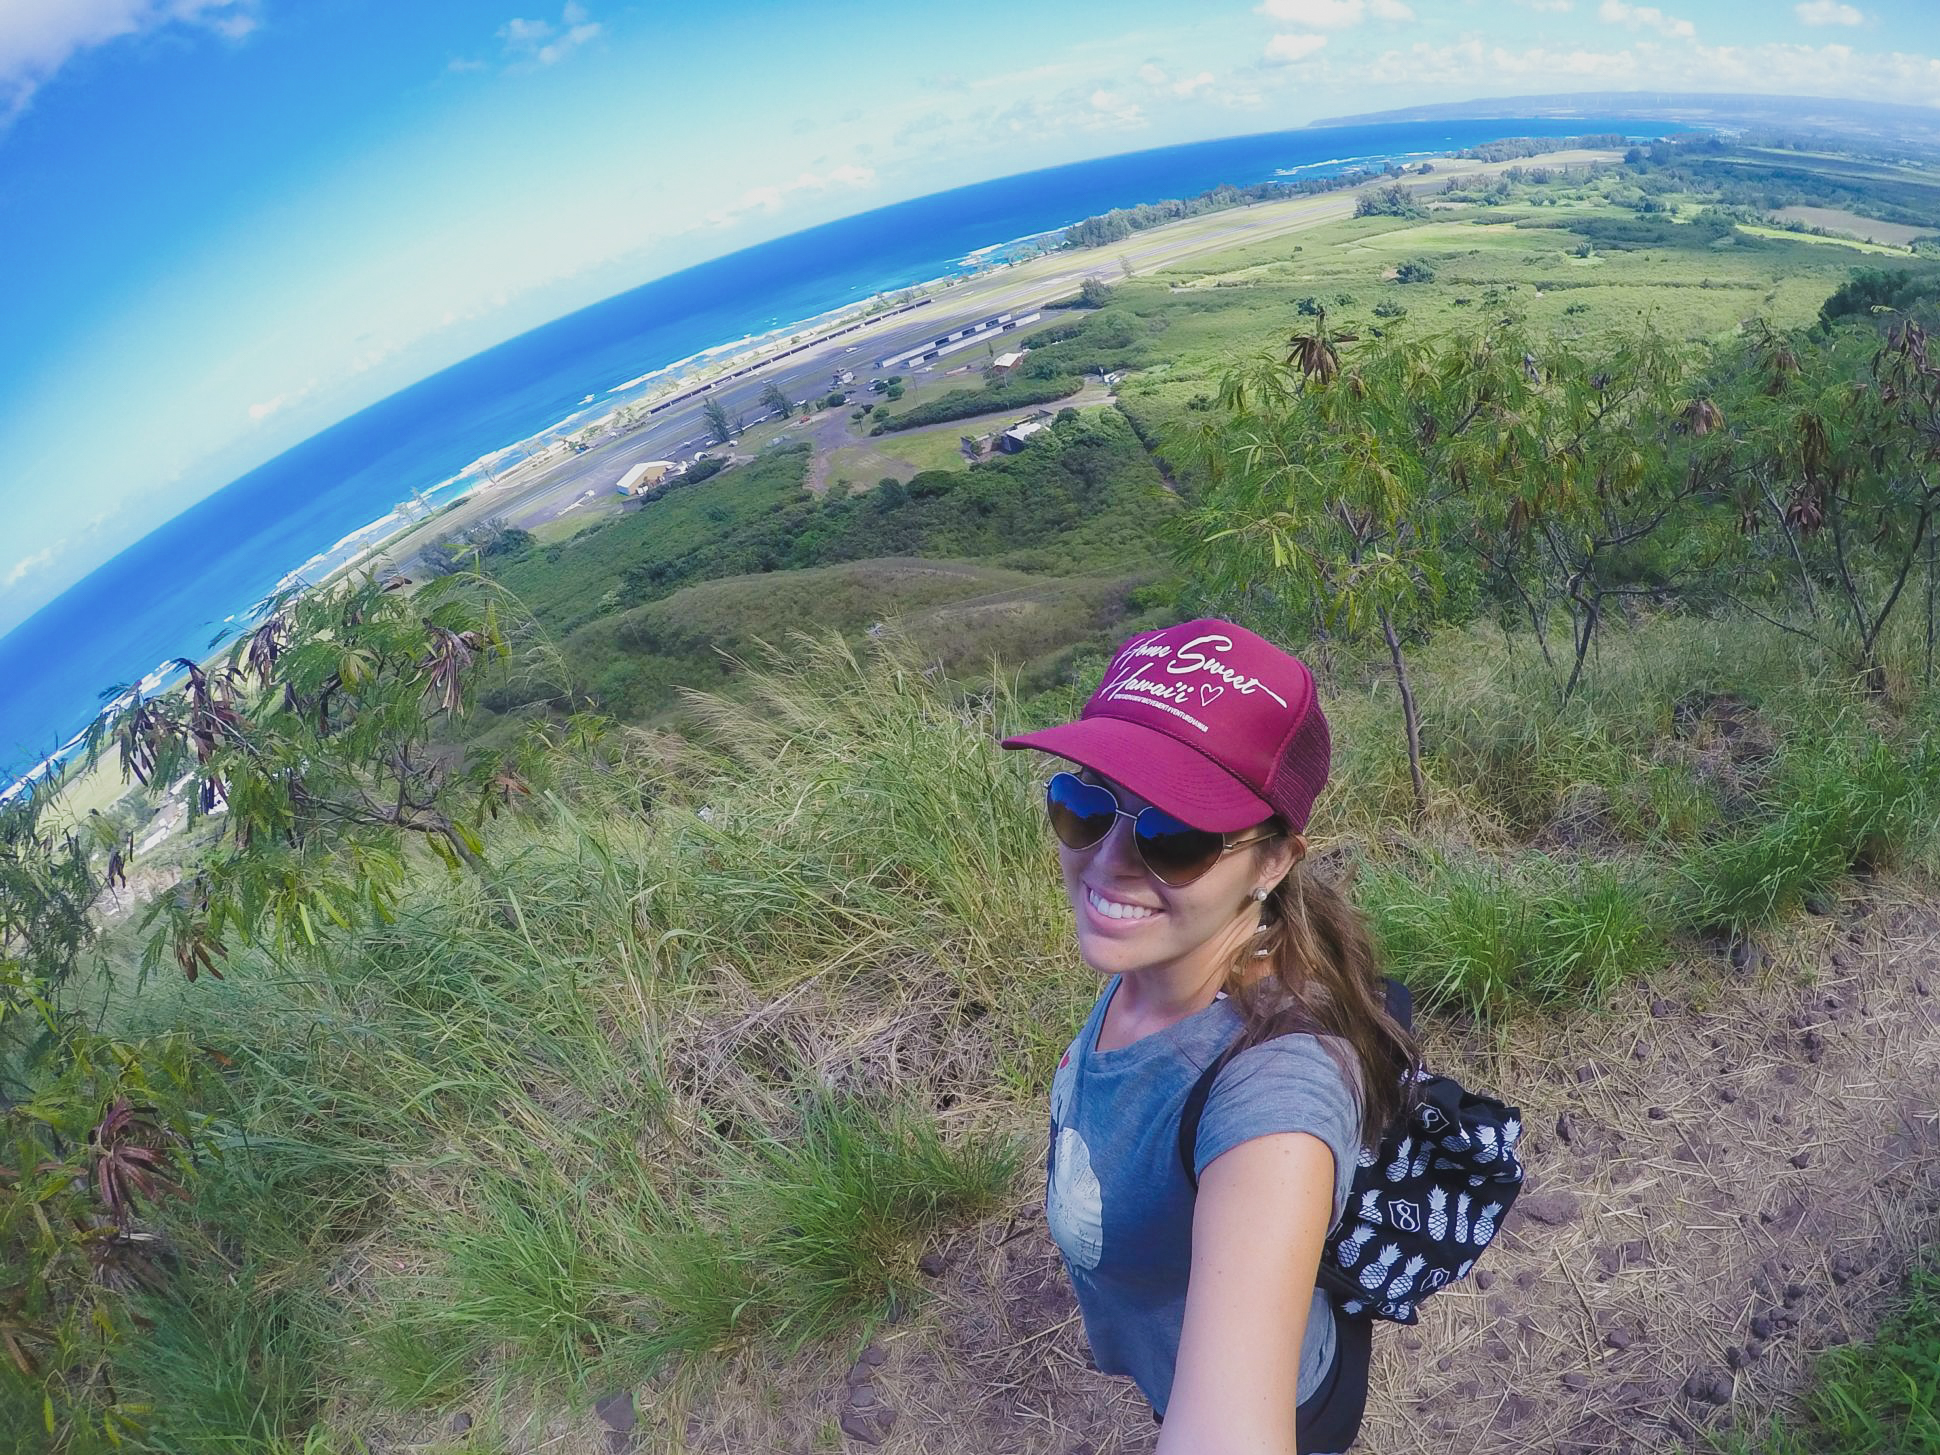
Getting a couple of photos is a good excuse to stop and rest your legs.
The views of the bright blue ocean are gorgeous on their own. Since you are hiking right by the Dillingham Airfield, you also get views of people testing their adventurous side and jumping out of planes.
It’s nice to see them gliding through the air and offers a little something different to the usual hiking views.
I stopped when I reached the picnic table but you can keep going and hike further to get even more of a leg workout to enjoy some Jurassic Park like mountainous views.
If not, you can turn around and head back down the trail.
View this post on Instagram
Safety tips
As with any hike, make sure you stick to the trail. Unfortunately, too many people fall from the unstable ground or get lost and need to be airlifted out after veering off trails. Staying on the trail is the easiest way to avoid this and keep yourself safe.
Protect yourself against heat-related illnesses when you are hiking by making sure you have plenty of water with you, sunscreen, hat, sunglasses, and snacks.
This hike can be strenuous on the legs so make sure you take breaks when you need to.
Other things to do nearby
After the hike, I went to Mokulēʻia Beach Park, which is an awesome beach only a few minutes away. It was very secluded and I had the whole place to myself for a while.
Here are some other things to do in the area and I have linked my guides for more information.
If you are looking for another hike in the area I recommend:
- Kaena Point from the North Shore end
- Ehukai Pillbox Trail
- Crouching Lion Trail is an iconic hike on the other side of the North Shore
For snorkeling on the North Shore, I recommend:
For beaches to chill out on, I recommend Sunset Beach, Banzai Pipeline, or Waimea Bay.
Make sure you stay on the North Shore to watch one of the impressive sunsets. There’s not really a bad beach for sunset, but I recommend Dolores’ Beach or Waimea Bay.
Where to stay on Oahu
I think it’s best to base yourself in Waikiki if you are planning a visit to Oahu. The location makes it easy to get around to different areas of the island and there is always something going on in Waikiki. I have stayed at the Hilton Hawaiian Village before and loved it.
They also throw a weekly fireworks show on Fridays so make sure you have a Friday in your itinerary.
If you’d prefer to stay on the North Shore, I have stayed at the Turtle Bay Resort and it’s incredible. It’s a great option if you really want to stay on the North Shore, though if you want to see more of the island, the location is a little out of the way.
For other hotels, I recommend searching on Booking.com. I use this to book accommodation when I travel and can always find a great deal through their website.
I hope this helps you plan an adventure on the Kealia Trail.
As always, check the weather forecast, stick to the trail, and use your best judgment as far as if this is a good adventure for you.
If you found this post useful, return the favor by sharing it or following me on Instagram!
Hi Katie, nice write ups on your adventures. Just some advice on hiking Hawaii trails. Please hike with someone. The last few years there were some people that either got lost or injured while hiking alone. A good group to hike with is the Hawaiian Trail and Mountain Club (HTMC). They are a group of very knowledgeable hikers in indigenous plant and animal life as well as Hawaiian geography and history. Look them up and they can really expand horizons on the trails.