UPDATED FEB 2020. Are you looking to take your travel photos to the next level? Well, you’re in luck because here are my top 6 travel photography tips for beginners to help you get the most out of your camera and improve your shots. I’ve also added how to create and save your own presets at the end too. I hope this helps and if you have any questions, let me know.
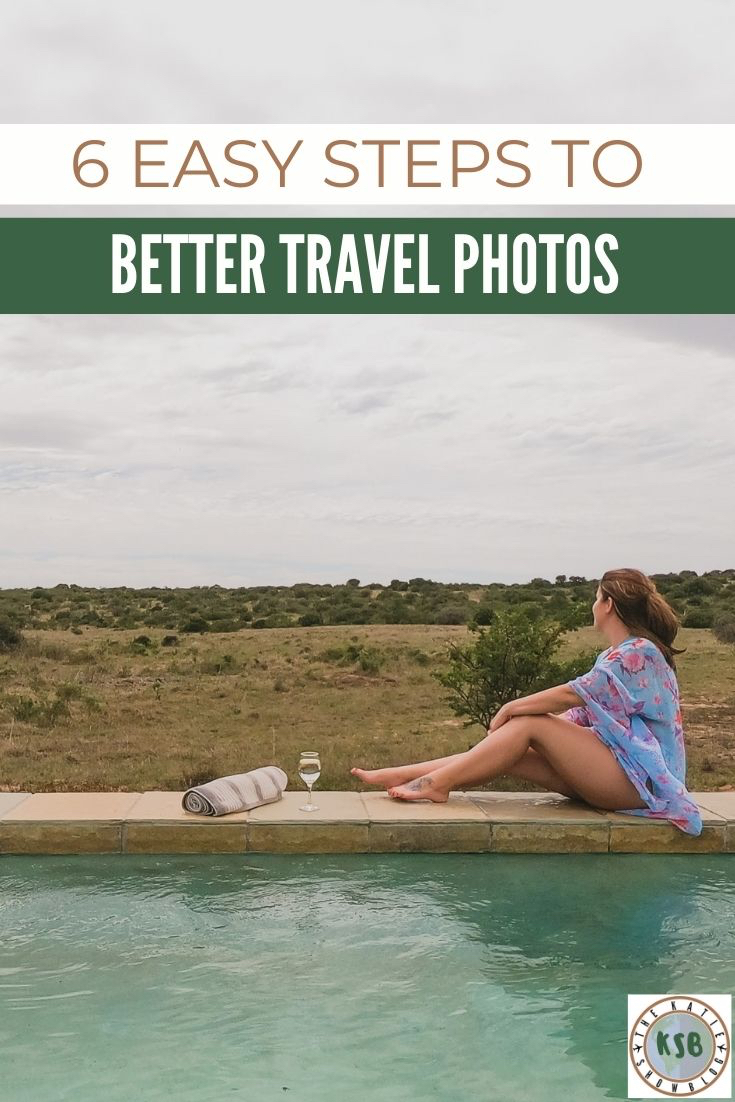
Travel Photography Tips For Beginners – Improve Your Shots In 6 Easy Steps
Disclaimer
There are affiliate links included in this post. This means at no extra cost to you, I earn a commission if you book through the link.
Best cameras for beginners
These are the cameras I use and will reference in the post.
My most used accessories
- Clear lens filter

- Tinted lens polarizer filter
- GoPro Shorty Pole – compact tripod and selfie stick
- Manfrotto tripod
View this post on Instagram
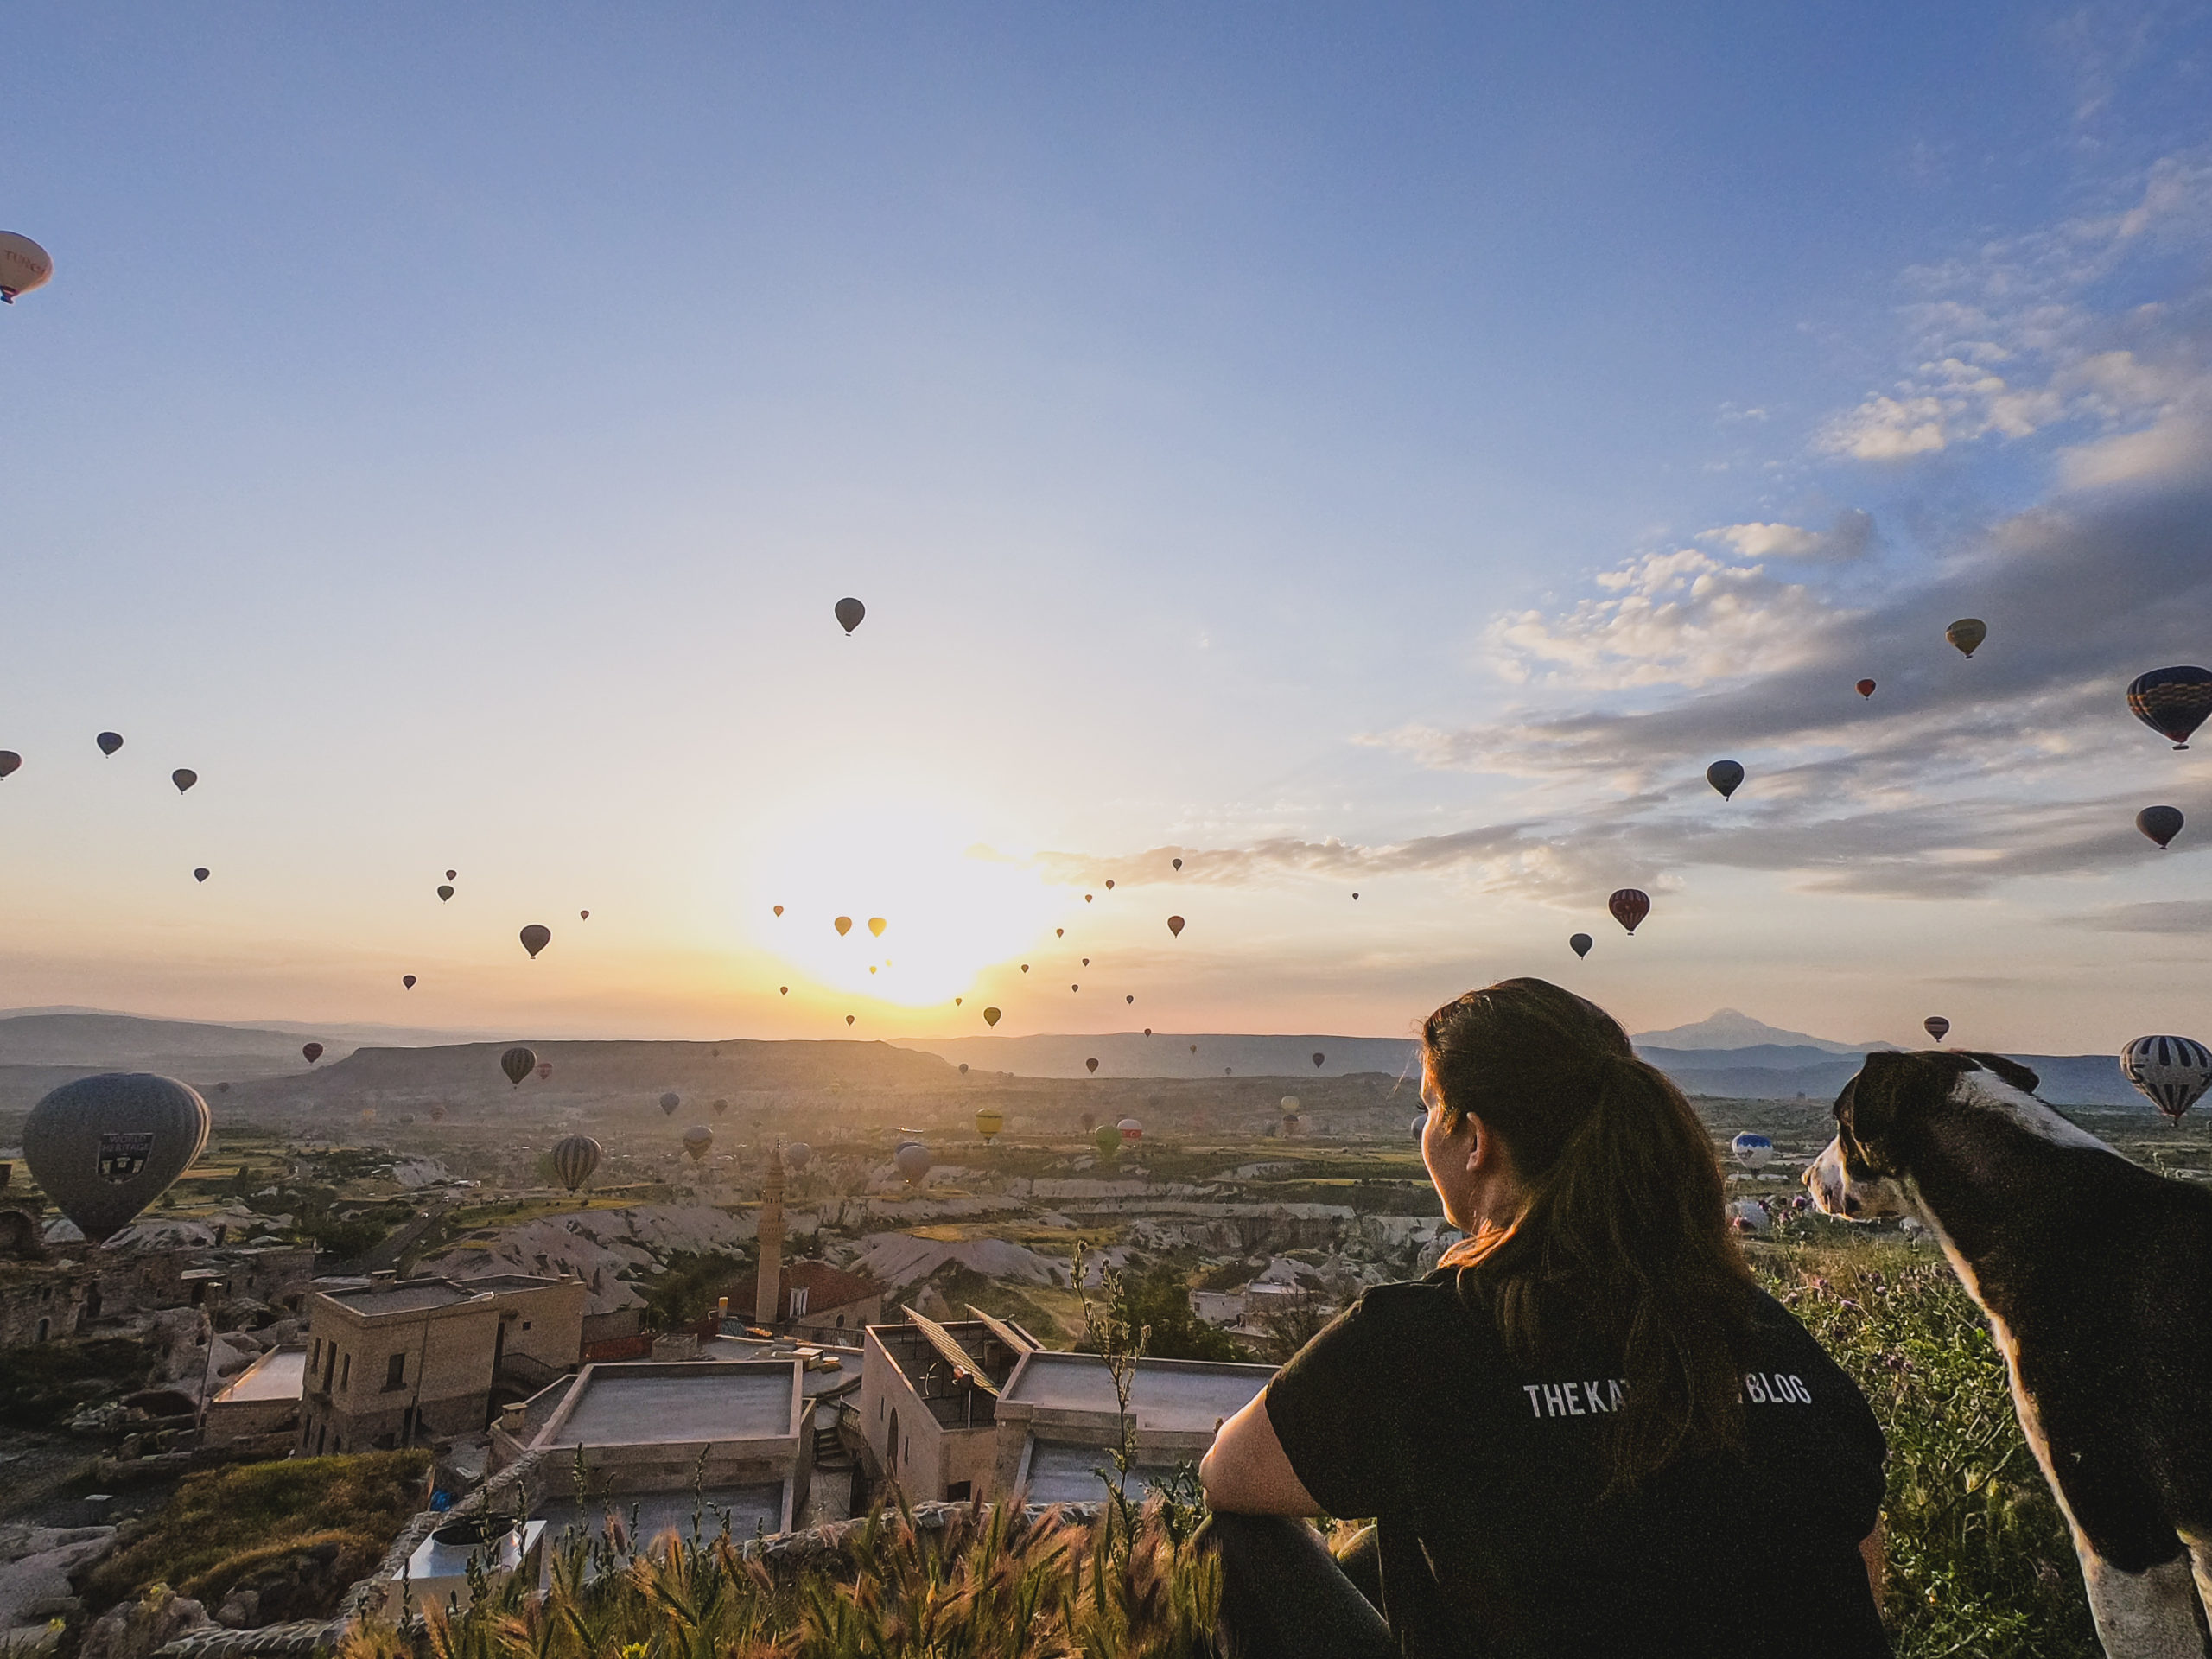
1. Choose your equipment
The first thing to consider when trying to improve your photos is what equipment you will be using.
You don’t need the fanciest new camera. All you need is something with a clean lens.
But, setting up your photo with your camera in mind will help you improve because you will be able to get the best shot for that specific camera.
For example, when I am taking photos with my GoPro, I keep the wide lens in mind and wouldn’t try to take a photo with me in it more than a few steps away from the camera. Otherwise, I would be small and blurry. For the GoPro, I get the most out of it by using it for selfies.
When I use my Sony with the 35mm lens, I know there needs to be a little distance between the subject and the camera to get a good shot.
Choose whatever camera is best for your travel style and how you want your photos to look, then take your photos to get the most out of that camera.
Taken on a GoPro with the GoPro Short Pole linked above. I’m only a few steps away from the camera.
2. Understand camera basics
This only applies if you are using a bigger camera like a DSLR or Mirrorless that has manual mode.
Let’s get you out of auto mode and in control of the camera settings.
Firstly, make sure the photo type in your camera is set to RAW, not Jpeg. When the camera saves the RAW photo, you have more ability to edit it, so if you get mess up the settings, you have more of an opportunity to save the photo.
Then, there are only 3-4 things you need to understand as a beginner – ISO, aperture, shutter speed, and white balance.
I’m going to simplify here but basically:
ISO
Controls how bright the photo is. The higher the ISO, the brighter the photo. However, the higher the ISO, the more grain you can see in the photo.
Aperture
Controls the focus. The lower the number, the more blurry the background is and the brighter the photo.
Shutter speed
It controls how fast the camera takes the photo. The higher the number, the faster the camera takes the photo which is good for fast-moving subjects. It also makes the photo darker.
The lower the number, the slower the camera takes the photo so it can make moving subjects blurry and will add more light.
White balance
This controls the tone of the photo – whether it is more warm or cool looking. Most cameras have settings for shady, daylight, fluorescent and other light sources.
How to use these basic settings
Set your camera to manual mode.
Then, go into the menu and set your camera buttons to have these basics easily accessible on the wheel or other buttons. You’ll need to use your camera’s manual to do this.
Now play with finding a balance between the settings and practice taking photos. I recommend putting the white balance on auto at first and starting with learning how the ISO, aperture, and shutter speed affect each other.
Think about it this way – what’s the most important thing about the photo? A blurry background, something moving fast, or is it dark and you need to add light?
Prioritize that setting, then adjust the others around that.
It might sound complicated, but I promise it’s much easier than it sounds.
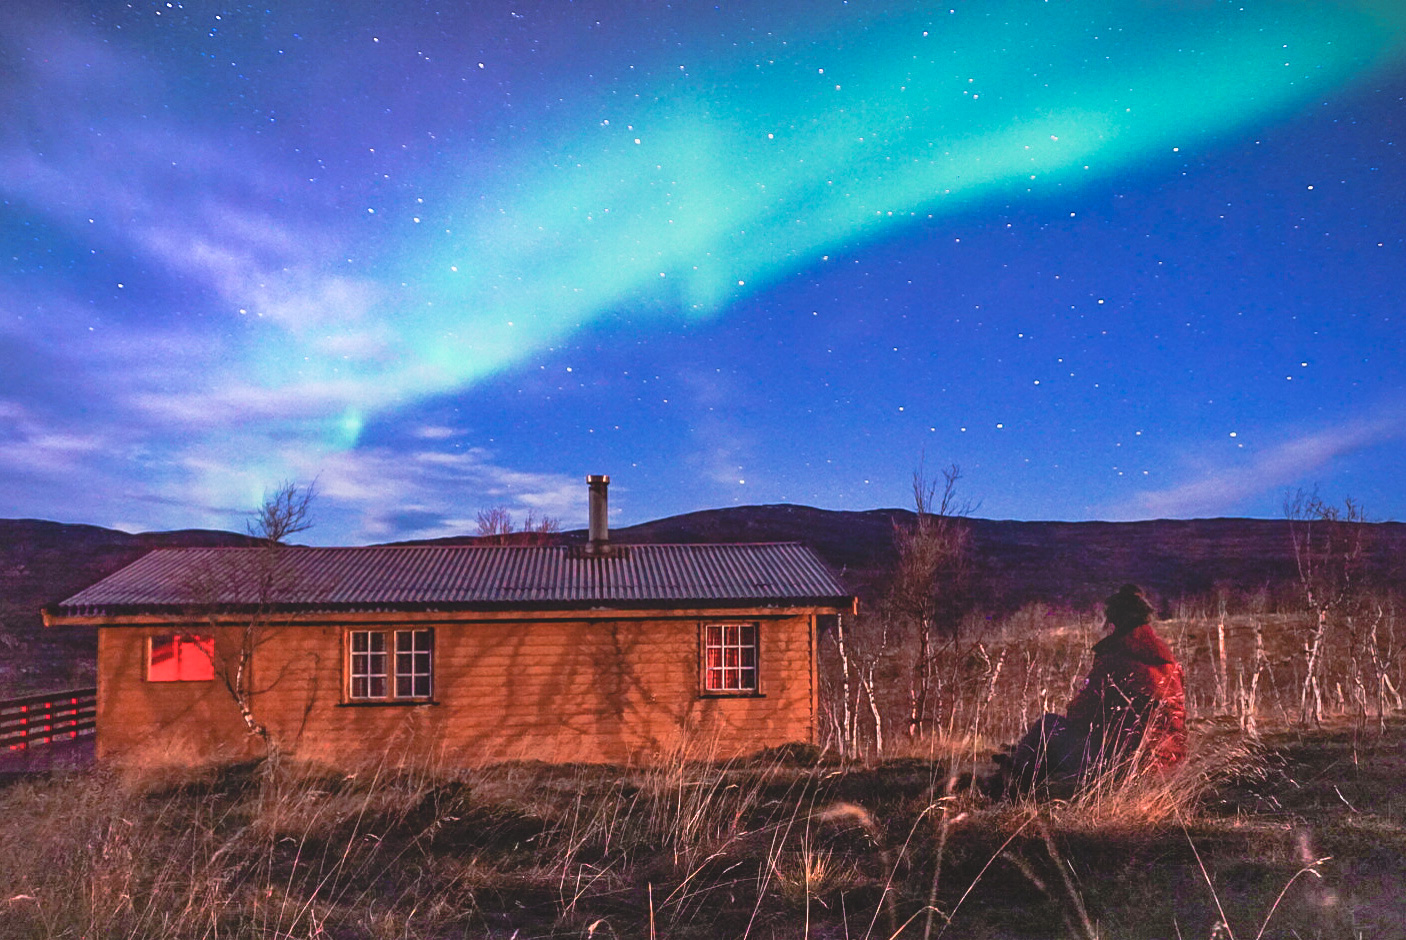
My post on how to take photos of the Northern Lights and night photography is linked at the end of this post
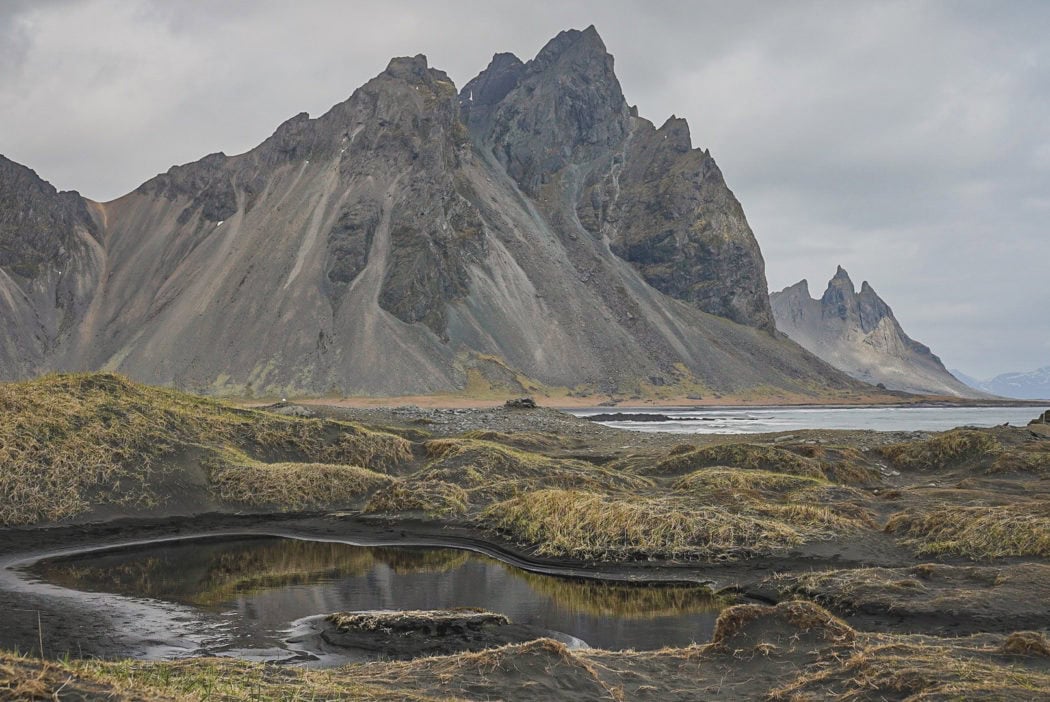
3. Think ‘If I had never seen this before…’
When you are traveling, it’s likely that you haven’t seen the place before somewhere.
This applies whether it is a famous landmark that we have all seen a million times like the Eiffel Tower or a lesser-known place that you have seen during your research.
Sometimes it creates a tunnel vision in you to a point where you go there and only see it the way you have seen all those times before.
One good tip I once read was to imagine that you have never seen the place/landmark before.
What details do you notice?
How do you view the scene?
What speaks to you?
It’s hard to re-wire your brain, but if you can do this, then you will be able to capture a new view, pick up things that would otherwise be missed, and show the scene through your eyes instead of regurgitating the same old photos.

A different view of the Colosseum in Verona, Italy
4. Add perspective to your travel photographs
Another one of the useful travel photography tips for beginners is to add perspective.
This way you can capture how big, small, crowded, peaceful, etc. something really is.
One thing I like to do is to use people to offer that perspective, but you could also use animals, trees or other objects.
Check out this example below.
The picture of the waterfall on its own is a nice landscape picture, but when you add the element of the person it completely changes and offers a new perspective of the size of the waterfall.
In a really crowded area, you don’t need to be frustrated by all the people.
Instead, you could use them to your advantage and have some hustle and bustle in your picture, with your object, e.g. a building, staying calm and steady through it all.
Use what you have to give your object a new dimension.
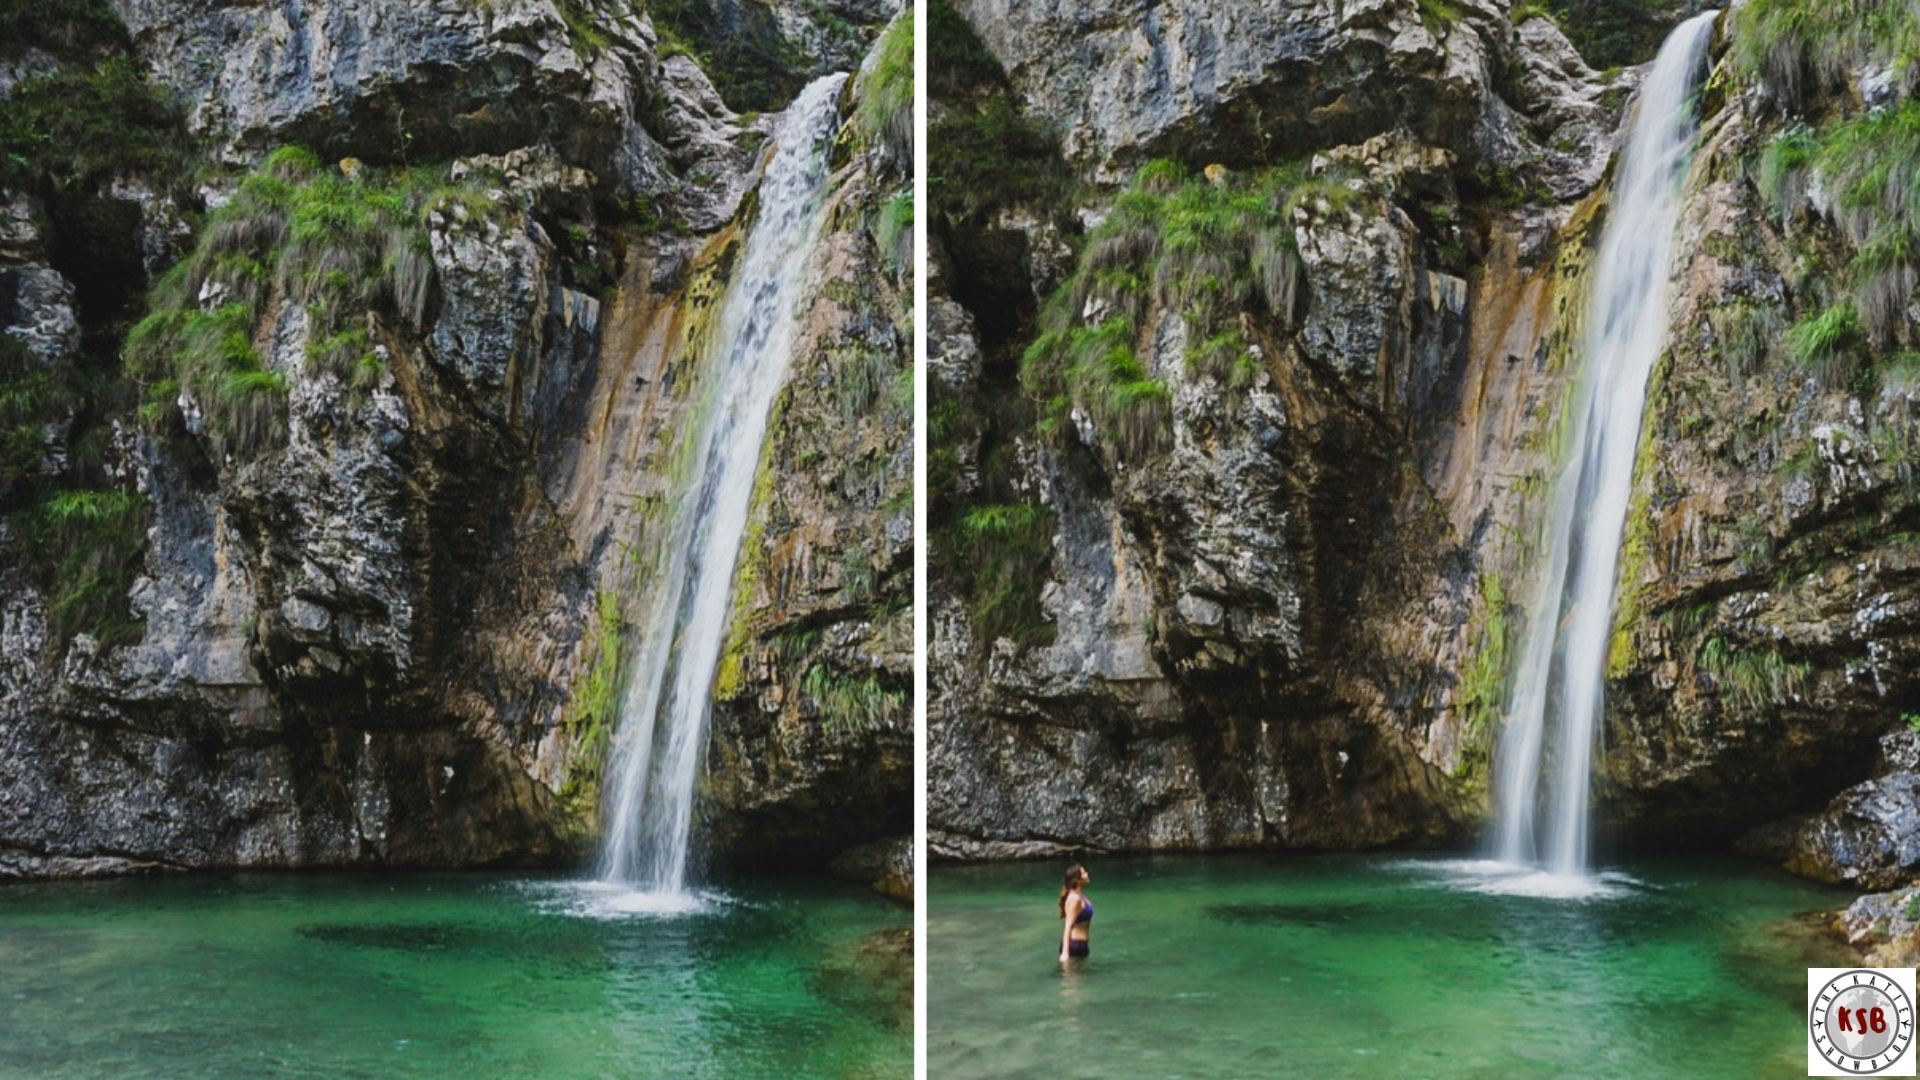
Use things or people to add perspective to your photos
5. Use a lens filter
When I was thinking of the best travel photography tips for beginners, this came to my mind fast because they are especially handy for travel. After all, when you are traveling you don’t only go out at sunrise and sunset like portrait photographers usually do.
You need to be able to take photos at any point throughout the day but daylight sun can be harsh and lead to washed-out photos.
Having a filter on your lens during the day is kind of like having a pair of sunglasses on your lens.
It’ll bring out the colors and cut some of the harsh, bright light.
They can also cut glare when you are taking photos of water.
For me, as a travel blogger, it’s a lifesaver so I can get the most out of my working time.
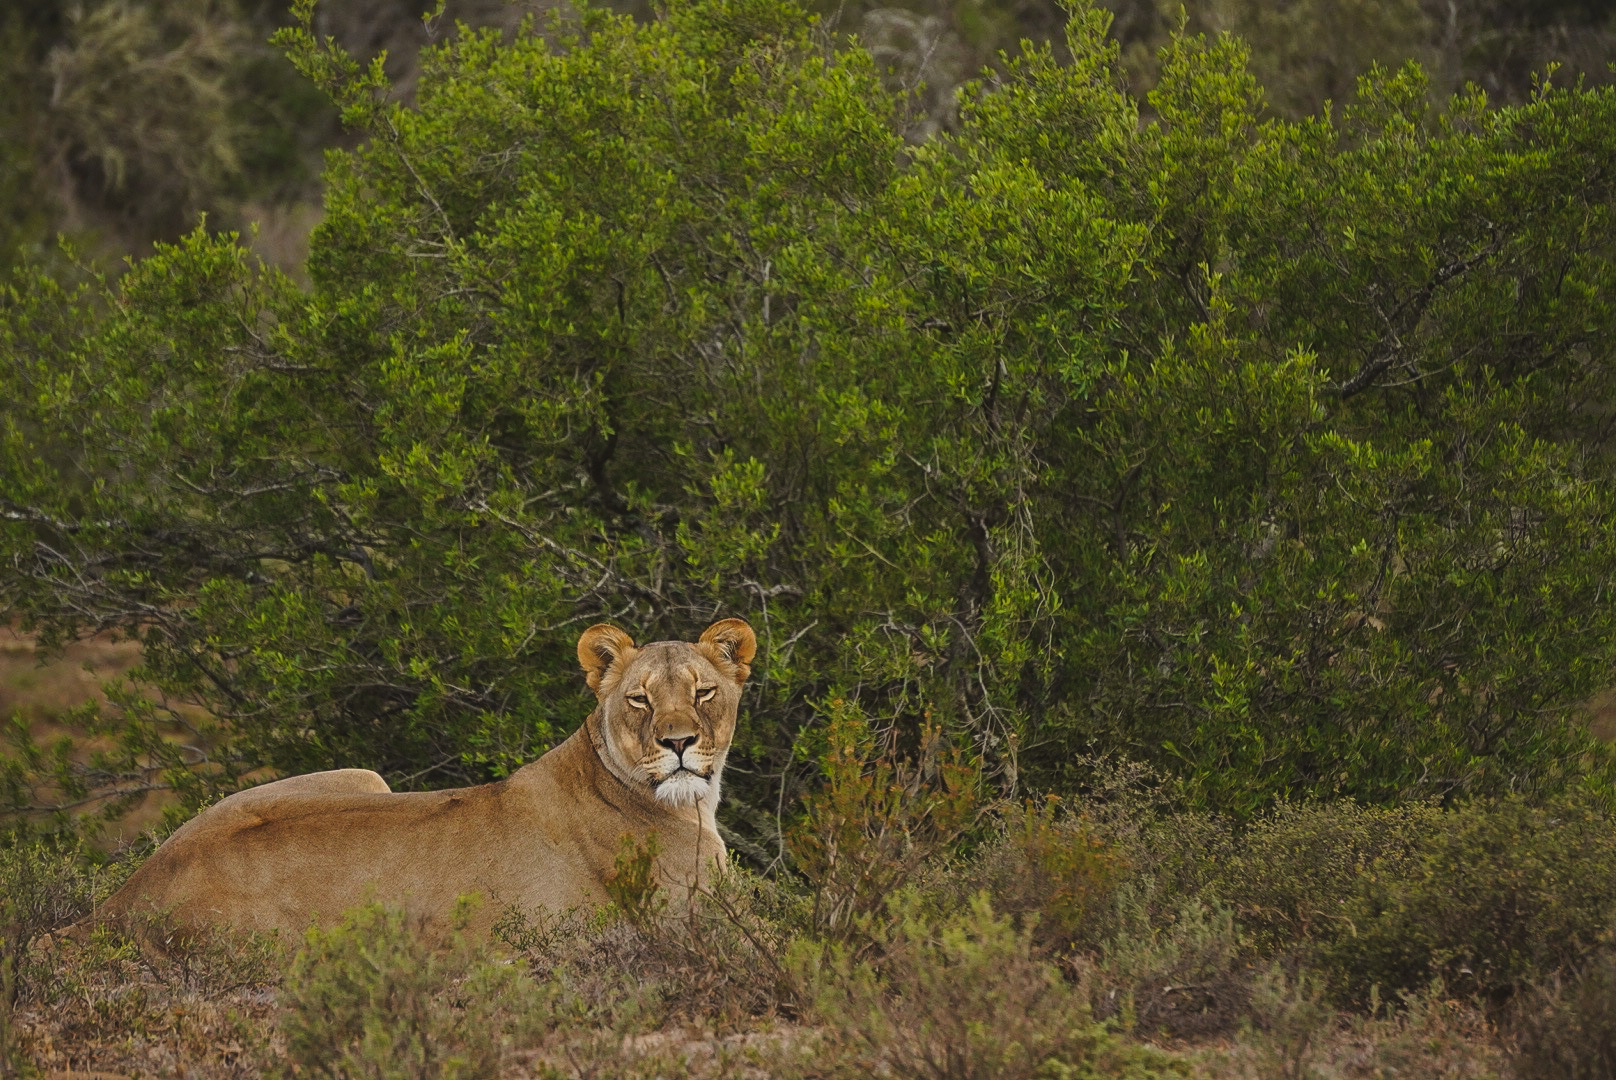
With the harsh sunlight, this wouldn’t have been possible without a polarizing filter
6. Edit your photos
Please don’t buy presets. They’re unnecessary.
You don’t have to be an expert to be able to understand how to edit your photos.
Sometimes all it takes is just removing some shadows or bringing out some colors and you can have a completely different photo, so don’t be afraid to use do a little editing.
I use Lightroom to edit my photos and have a paid subscription. Some of the other apps I’ve used in the past are VSCO and Enlight.
The best way to learn what each feature does is to move the slider to either end of the extreme. Then you have an understanding of what it’s capable of and you can find the spot that you like.
How to create your own presets even if you are a beginner
You can also create your own presets in your phone to make it faster to edit. Once you’re happy with your edit:
- Click the three dots in the top right-hand corner
- Choose ‘create preset’
- Name the preset and choose what settings to save
And here’s how to save your own presets on your computer:
- In the develop tab, click the ‘+’ icon in the preset sidebar
- Click ‘create new preset’
- Name your preset and choose what settings to save
Other posts you might enjoy
- A Beginners Guide To Photographing The Northern Lights
- My Top Tips On How To Get Photos As A Solo Female Traveler
- Treat Yo’self Style Gifts For Women Who Love To Travel
If you found this useful, return the favor by sharing it or following me on Instagram!
This is great 🙂 love that you also mention that phones produce photos almost as nice as cameras these days! Also definitely going to try out your perspective tip 🙂
Thank you so much! So true though, sometimes I am amazed at what my phone camera can do! 🙂
These are great tips! Taking great quality photos is something I would like to improve on and your post has definitely provided some great advice! 🙂
Thank you, I’m so glad it helped. I am always trying to improve my photos too – it’s an obsession!
Nice tips! Thanks 🙂
You’re very welcome!
Great tips and great pictures. You are right we need more candid photos, I am going to try to do more of that going forward.
Thank you so much. I can’t wait to see your candids!
I loved reading this guide. I’m always trying to improve my ‘travel shots’ so I always love reading other people’s tips as you definitely learn something new every time! Editing is definitely key- it can transform a ‘good’ photo into a great one! 😀
Me too and I am always reading here and there looking for ways to improve. Thank you so much for your comment.
Great tips. I’m a bit torn with equipment (I mix between a Nikon / Iphone / Go Pro), but totally agree about trying to capture it like someone has never seen it before. It’s especially effective for my parents who haven’t been to many of the places I’ve been–so capturing it as it really is with a bit of perspectives matters a lot. Love your photos. 🙂
There’s so much equipment right?! I love this and bet it would be nice for you to compare photos with your parents too!
Loved this post! Such good/practical tips. I’d love to see a post where you walk us through step by step of how you edit a photo for IG. What apps do you use? How do you brighten the greens/blues? That’d be super helpful.
Ok, I have noted that in my brains filing cabinet! Thank you so much for the idea, I will start to brainstorm what tips I could provide in a step by step flow. Appreciate the feedback and in the meantime if you have any questions I’d be happy to help if I can – thekatieshowblog@gmail.com